Identify the defect before choosing a treatment. Compression blocks, blur and scratches are different problems. Compare edges, texture and identity—not just pixel count. An enhancement prompt cannot guarantee recovery of information missing from the source.
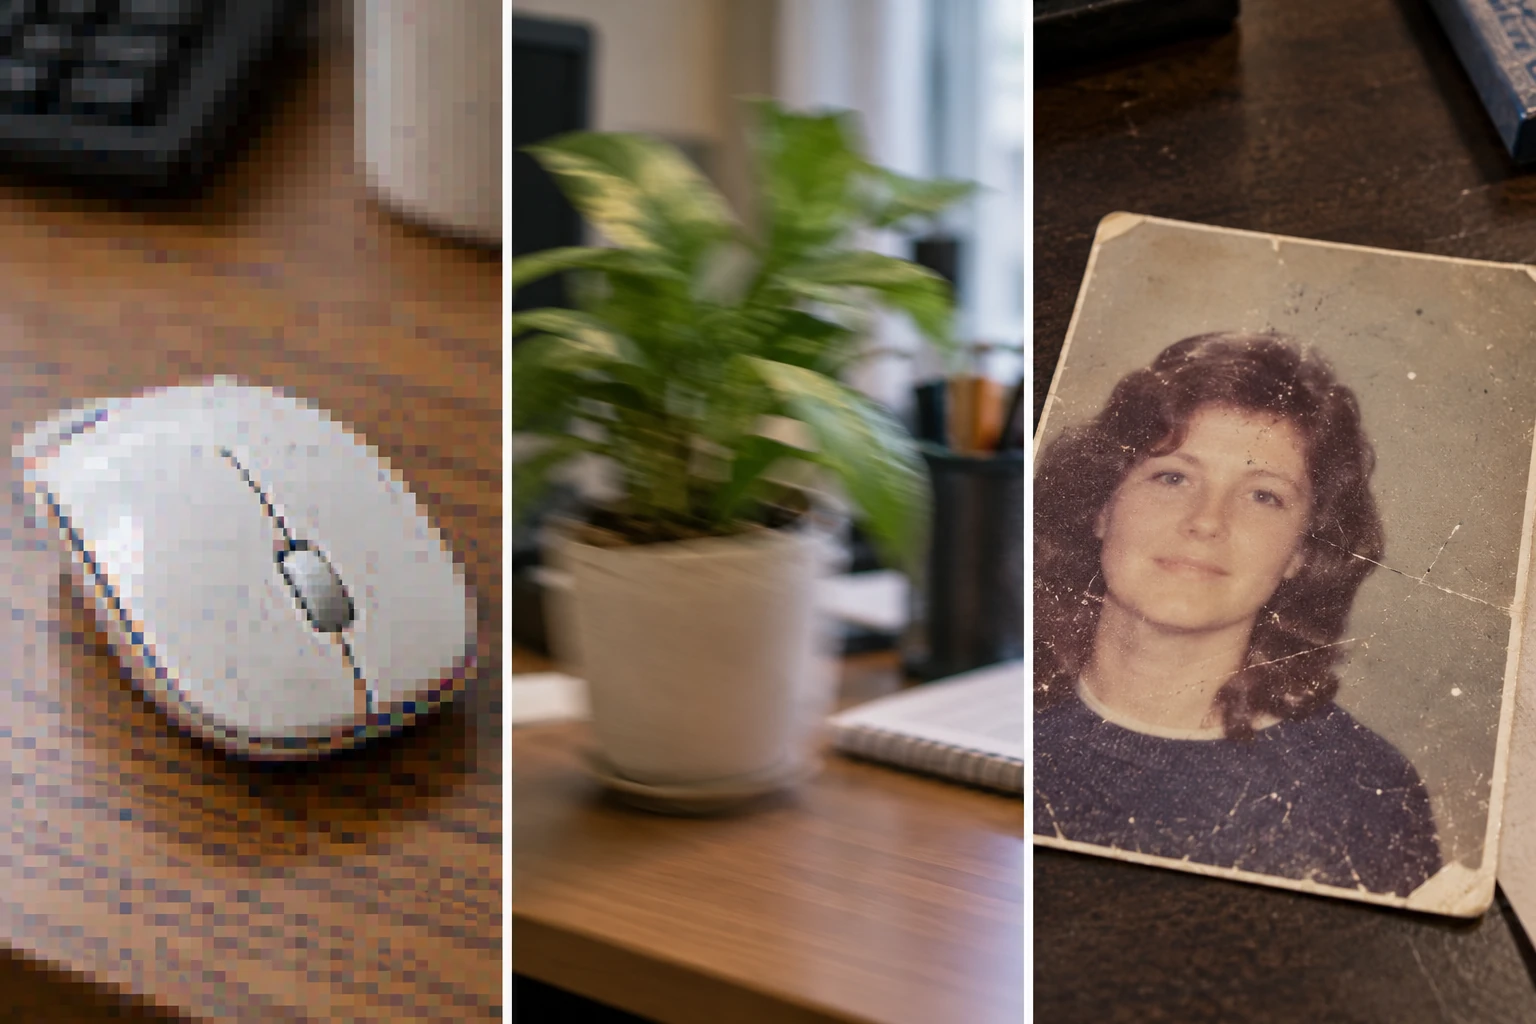
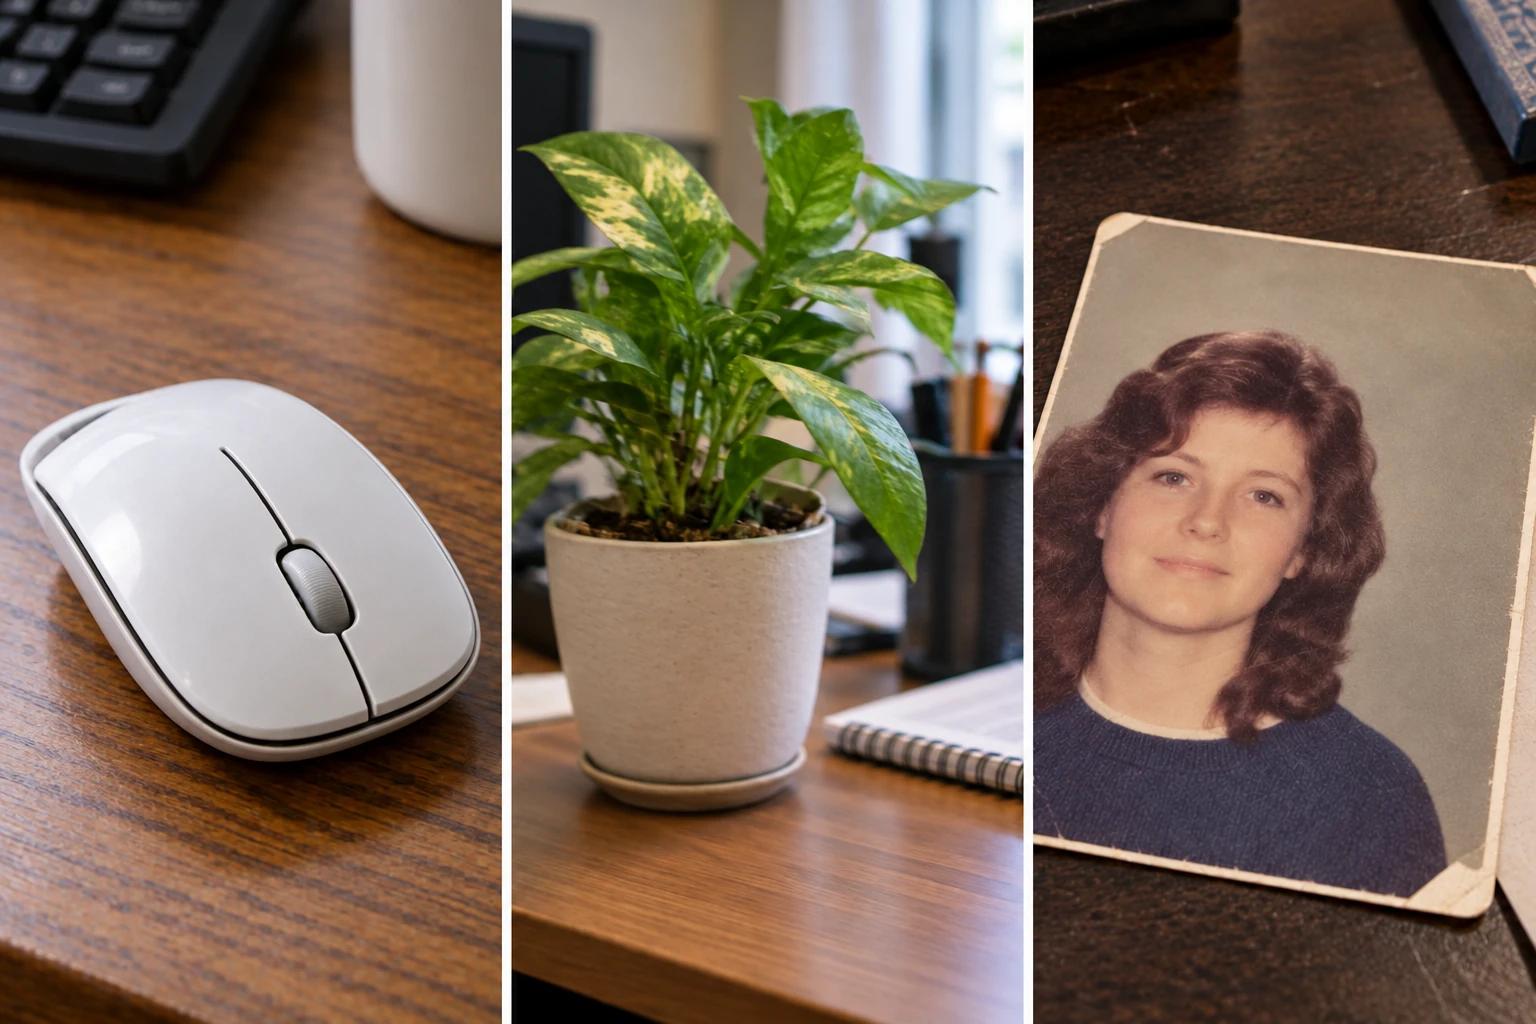
A repeatedly shared work image, a blocky product detail and a scratched old print need different treatment. This guide uses a three-part teaching image to explain instructions and result checks, not a universal improvement percentage.
Diagnose three different problems
Inspect the original at a useful scale. Stair-step edges and large blocks suggest resolution or compression issues; soft or smeared edges suggest capture blur. On scanned prints, distinguish dust and scratches from genuine texture. Small thumbnails can hide these differences.
Swipe horizontally to see the full table →
| Problem | Treatment focus | Review focus |
|---|---|---|
| Compressed product image | Reduce blockiness; preserve product structure | Check ports, controls and textures for redesign |
| Out-of-focus or shaky photo | Improve edges cautiously; avoid invented text | Check natural contours and sharpening halos |
| Dusty or scratched old print | Clean surface damage; preserve identity and tone | Check facial features, marks and clothing |
An example enhancement brief
Do not rely on '4K, ultra sharp' alone. Describe the defect and what must stay unchanged. Product geometry matters more than invented microtexture. For an old portrait, identity matters more than smooth skin.
Only improve clarity and reduce compression blocks, blur, dust and small scratches. Keep the three panels, object positions, lighting and colors. Do not redesign the mouse, add text, change the pot or alter the portrait identity. Use natural edges and restrained texture, without sharpening halos. Keep missing detail modest rather than inventing readable labels.
Teaching comparison: review improvement and change
The image below was made by an image generation tool using the example brief, not this site's Enhance button. Compare the mouse outline and wheel, pot edge and facial features before the desk and paper texture. A clearer image still needs checks for invented detail.
In this illustration, the mouse seams and wheel become clearer, as do leaf veins and portrait hair. Those details are missing in the input, however, so their accuracy cannot be established from the pair. This does not predict your result. A real evaluation should retain input, model, quality, resolution, prompt and output, and compare at a similar viewing size.
Teaching input
Generated illustration
Use the tool, then inspect beyond resolution settings
Open Enhance and upload the highest-quality file available. Choose a model and output resolution, then describe the task. Avoid repeated screenshots, resizing and sharpening beforehand, which can introduce additional artifacts. Check the displayed cost and retain the original for comparison.
Resolution options such as 2K or 4K do not mean every detail has been recovered from the original. Check eyes, hair, labels, holes and seams. If structure changes, improve the source or tighten the brief instead of increasing resolution alone.

When generated detail is not reliable evidence
Do not treat generated numbers, faces or structure in blurred contracts, IDs, medical images or evidentiary footage as verified facts. Find the original, recapture it or check with the source. Visual improvement is not factual recovery.
- Sharper edges but plastic texture: reduce extreme-sharpness instructions and preserve natural texture.
- Changed likeness: compare the original and state identity constraints; reject uncertain results.
- Rewritten label letters: verify the physical label rather than accepting generated fine print.
Common questions
Is enlarging a photo the same as making it clearer?
No. Enlargement changes pixel dimensions. Clarity also depends on edges, noise and visible detail. A bigger output may not contain more verified information; compare at a similar viewing size.
Can severely blurred text be recovered accurately?
There is no guarantee. When strokes are missing, a model may produce sharp-looking but incorrect words. Find the original or recapture important text.
Should old-photo repair include beautifying and colorization?
Not necessarily. Repair dust, scratches and clarity first, then review identity before making stylistic changes. Colorization is a separate creative task, not proof of the original colors.
Open the right tool, then review the result at full size.